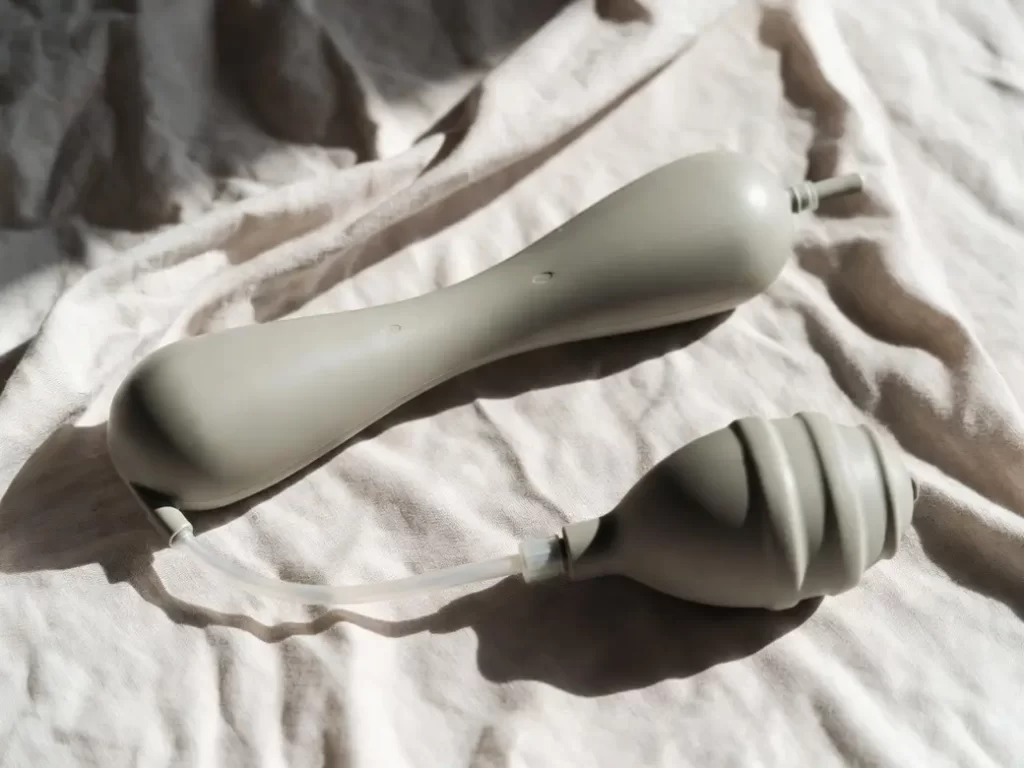

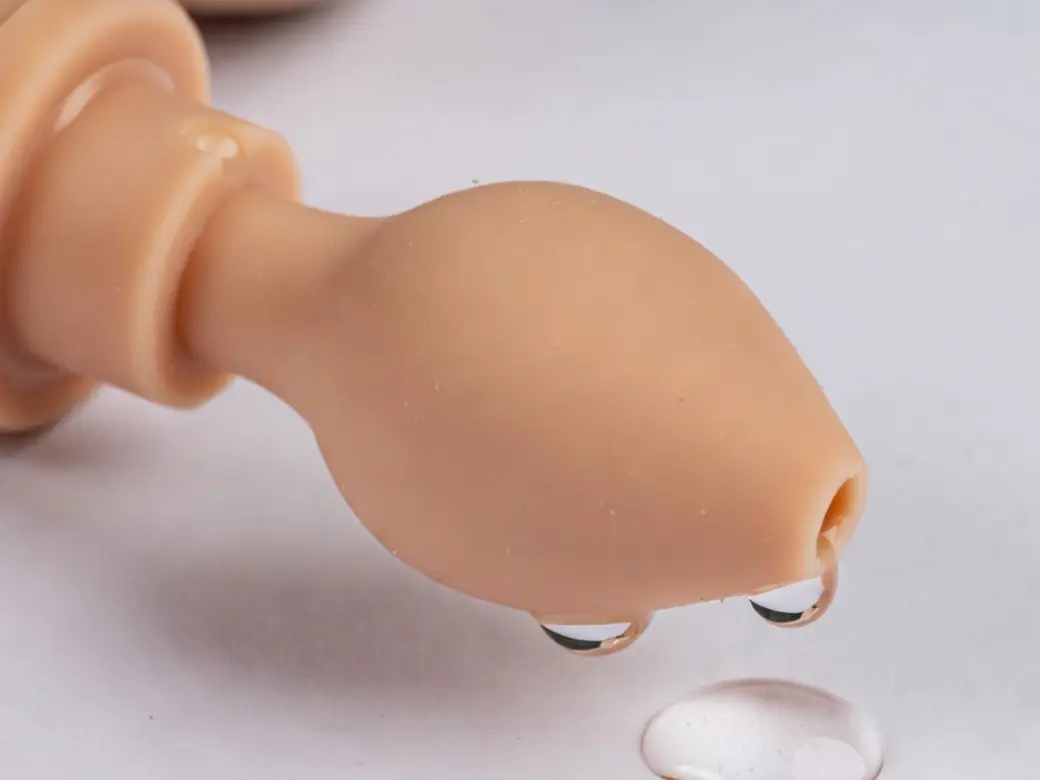
A squirting dildo may stop producing a stream even when the reservoir appears full and the pump still moves. The problem can originate in several places: the pump may not be drawing liquid, air may be trapped in the tubing, the nozzle may be blocked or a connector may be leaking.
Weak output does not always mean that the product is broken. Some systems need to be primed before liquid reaches the nozzle, and a partially folded tube can interrupt flow without causing permanent damage.
Begin with the product switched off and disconnected from any charger. Use only liquids and cleaning methods approved by the manufacturer. Do not insert a needle or other sharp object into the nozzle.
How Does the Squirting System Move Liquid?
Most squirting dildos use a relatively simple fluid path:
- Liquid enters from a reservoir or container.
- A manual bulb or powered pump creates suction.
- Liquid moves through a flexible tube.
- A valve controls its direction.
- The liquid exits through a nozzle or opening.
Some products store liquid inside a built-in reservoir. Others draw it from an external container through a tube. A few combine the squirting system with vibration, thrusting or heating functions.
The exact arrangement matters because a manual bulb, powered pump and refillable reservoir can fail in different ways. Check the instructions to identify:
- Where the intake is located
- How the reservoir is filled
- Whether the pump needs priming
- How the tubing connects
- Whether the nozzle can be removed
- Which parts are washable or submersible
- How the system should be emptied and dried
Our squirting dildo guide explains common pump and reservoir designs in more detail.
What Kind of Failure Are You Experiencing?
The symptoms can help narrow down the problem before you disassemble any removable parts.
The Pump Moves but Nothing Comes Out
The system may contain air instead of liquid, the intake may not be submerged or the tube may be disconnected.
A blockage is also possible, particularly when residue was allowed to dry inside the nozzle or tubing.
The Stream Is Weak or Interrupted
A weak stream may result from:
- Air bubbles
- A kinked tube
- A partially blocked nozzle
- A low liquid level
- A loose connection drawing in air
- Thick liquid
- Low battery power
- A worn manual pump bulb
The product may produce short bursts as air and liquid move through the line.
Liquid Leaks Before Reaching the Nozzle
Inspect the reservoir cap, tube connections and any joint between the dildo and pumping system. A loose fitting can allow liquid to escape while also preventing the pump from creating sufficient suction.
The Pump Bulb Does Not Reinflate
A manual bulb should generally return toward its original shape after being squeezed. If it remains collapsed, the air or liquid path may be blocked, the tube may be kinked or an internal one-way valve may be stuck.
Do not pull or puncture the bulb to make it expand.
The Powered Pump Makes Noise but Does Not Move Liquid
A motor sound without output may indicate trapped air, a blocked intake, low battery power or an internal pump problem.
Switch it off if the sound becomes strained, irregular or unusually loud.
Confirm That the Reservoir Is Filled Correctly
An incorrectly filled reservoir can prevent the pump from drawing liquid.
Follow the manufacturer’s filling instructions and do not exceed the stated capacity. Leave any required air space rather than forcing additional liquid into a sealed chamber.
Check whether:
- The fill cap is fully closed
- The intake opening reaches the liquid
- The reservoir is installed in the correct orientation
- A removable container is seated properly
- Protective shipping plugs have been removed
- The liquid level is high enough for the intake
- A cap seal or gasket is missing or twisted
Do not assume that every opening is intended for filling. Using the wrong port could introduce liquid into a motor housing or charging area.
Does the Pump Need to Be Primed?
Priming means moving liquid through an air-filled tube until it reaches the pump or nozzle. A newly filled or recently cleaned system may need several slow pump cycles before producing a consistent stream.
Use the priming procedure described in the manual. A general observation sequence is:
- Fill the reservoir correctly.
- Position the intake as directed.
- Keep the tube as straight as possible.
- Operate the pump slowly.
- Watch for liquid entering the transparent section, if visible.
- Pause if the pump does not begin drawing liquid.
- Recheck the connections instead of increasing force.
Do not run a powered pump dry for an extended period. Some small pumps depend on liquid flow and may be damaged or overheated by prolonged dry operation.
Check for Air Bubbles
Air inside the tubing can interrupt suction and produce weak or uneven output. Small bubbles may clear during normal priming, but a constant stream of new bubbles can indicate that air is entering through a loose connection.
Inspect the visible tubing while operating the pump briefly. Look for:
- A large stationary air pocket
- Repeated bubbles appearing at one connector
- Liquid moving backward after each pump
- A section that never fills
- Bubbles entering near the reservoir cap
Reconnect removable tubing according to the instructions. The tube should sit securely without being stretched or forced onto an incompatible fitting.
Do not use glue to seal a leaking connection. Adhesive can enter the fluid path, harden the tube or make cleaning impossible.
Inspect the Tubing for Kinks and Damage
A flexible tube can become folded during storage or pinched beneath the product. Even a small bend can restrict flow.
Run your fingers lightly along the tube and examine it under bright lighting. Check:
- Connections at both ends
- Areas hidden beneath a base or cover
- Sharp bends
- Flattened sections
- Cuts or pinholes
- Cloudiness or residue inside
- Stretching around a connector
- Sections that feel unusually stiff
Straighten a mild bend without pulling the tube. If a kink remains collapsed or the tubing is cracked, contact the manufacturer about replacement parts.
Do not substitute aquarium, medical or household tubing unless the manufacturer confirms the dimensions, material and compatibility.
Could the Nozzle Be Blocked?
Residue can dry near a small outlet and restrict the stream. This is more likely when the system was not flushed immediately after use.
A blockage may cause:
- A very narrow or uneven stream
- Liquid leaking from another connection
- The pump becoming difficult to press
- The bulb remaining compressed
- Increased motor noise
- No output despite a filled tube
Inspect the nozzle from the outside. Do not insert pins, needles, wire or toothpicks. A sharp object may enlarge the outlet, puncture internal tubing or push residue deeper into the system.
Use only the manufacturer’s flushing or nozzle-cleaning method. If the nozzle is removable, detach it only as directed and keep track of seals or small components.
Is the Liquid Too Thick?
A squirting system is designed for a limited range of liquid viscosity. A thick or sticky liquid may move slowly, trap air or remain inside the tubing.
Use only fluids explicitly approved for that model. Do not dilute a product or create a homemade mixture unless the manufacturer confirms that it is suitable.
When troubleshooting, manufacturer-approved plain cleaning or test fluid may help determine whether the pump works with a lower-viscosity liquid. Keep this test separate from use and flush the system afterward.
If the pump works with the approved test fluid but not the original liquid, viscosity or residue may be the main issue rather than a mechanical failure.
Check the Battery on Powered Models
A powered pump may turn on while lacking enough battery power to move liquid effectively.
Charge it fully using the supplied cable and compatible power source. Ensure the charging port is clean and completely dry.
After charging, perform a brief test without running the pump for an extended period. Stop if:
- The motor slows quickly
- The housing becomes hot
- The sound changes
- The controls become unresponsive
- Liquid appears near the charging area
- There is an electrical or burning odor
Do not operate or charge the product if moisture may have entered a non-waterproof electrical compartment.
A Basic External Inspection
Before a flow test, examine the entire system.
Look for:
- A cracked reservoir
- A loose fill cap
- Missing seals
- Split tubing
- A detached connector
- Damage near the nozzle
- Liquid beneath the outer layer
- Swelling or discoloration
- A leaking pump bulb
- Wetness around the motor housing
Photograph any defect before cleaning or attempting to reconnect parts. Keep the packaging, accessories and order information if the product is new.
In Part 2, we will cover a safe water-flow test, how to flush and dry the internal tubing, methods to avoid, what to do when the pump leaks, when replacement is necessary and how to document the problem for a warranty claim.
How to Perform a Basic Flow Test?
A controlled flow test can help you determine whether the problem is caused by the original liquid or by the pump system. Perform this test only when the manufacturer permits the recommended test liquid and confirms which components may become wet.
Switch off any unrelated functions and disconnect the charger. Keep non-waterproof controls, ports and motor housings dry.
Prepare the System
Clean the reservoir and accessible tubing according to the product instructions. Inspect all removable seals and reconnect the tube without stretching it.
Use only a manufacturer-approved test or cleaning liquid. Do not add household chemicals, oils, fragrances or improvised mixtures.
Prime the Tube Slowly
Position the intake correctly and operate the pump at a slow, steady pace. If the tubing is transparent, watch the liquid move through it.
A functioning system should gradually replace the air in the tube with liquid. A few initial bubbles may be expected after filling or cleaning.
Stop if:
- The pump becomes increasingly difficult to operate
- The bulb remains collapsed
- Liquid leaks near an electrical component
- A connector separates
- The tube swells
- The powered pump becomes hot
- The motor sound becomes strained
- No liquid enters the tube after the instructed priming procedure
Observe the Output
Once primed, check whether the nozzle produces a consistent stream. Do not point it toward electronics, furniture or another person during troubleshooting.
Compare several slow pump cycles. An irregular first output may simply clear remaining air, but continuing weakness or interruption suggests a flow restriction or air leak.
Test One Variable at a Time
If the product has removable parts, change only one connection or component before retesting. This makes the source easier to identify.
For example:
- Confirm the reservoir is seated.
- Test the flow.
- Reconnect the intake tube.
- Test again.
- Inspect the nozzle.
- Repeat only if the earlier steps were safe.
Avoid repeatedly disassembling small valves and seals. Stop once the fault requires access beyond the manufacturer-approved user-serviceable parts.
How to Flush the Internal Tube
Internal residue can narrow the tubing, affect one-way valves and block the nozzle. Flush the system promptly after use according to the manufacturer’s directions.
Empty the Reservoir
Remove or release the remaining liquid using the approved procedure. Do not store the product with liquid inside.
Dispose of the contents appropriately rather than returning them to their original container.
Fill With the Approved Cleaning Liquid
Use the cleaning method specified for the model. Do not assume that strong disinfectants are required or compatible.
Operate the pump until the cleaning liquid passes through the complete fluid path and exits the nozzle.
Repeat if Necessary
One pass may not remove all visible residue. Repeat with fresh approved cleaning liquid until the output appears clear and no foam or product residue remains.
Do not run a powered pump continuously beyond its operating limit. Pause as directed to prevent overheating.
Perform a Final Rinse
If the manufacturer requires a rinse, pump clean, approved rinse liquid through the system. Residual cleaner can dry inside the tubing and cause future sticking or blockage.
How to Dry the Reservoir and Tubing?
Drying is particularly important because narrow tubing can retain small droplets after the exterior looks dry.
Follow the manufacturer’s drying procedure. Depending on the design, it may include:
- Draining the reservoir completely
- Holding the tube in a specified position
- Operating the empty manual bulb briefly
- Detaching user-removable tubing
- Leaving approved openings uncapped during drying
- Allowing adequate air-drying time
Do not store the product in a sealed container while its internal fluid path remains wet.
Avoid using:
- Hair dryers
- Radiators
- Ovens
- Compressed air
- Heat guns
- Cotton fibers pushed into the tubing
- Unapproved drying powders
Powered pumps should not be run dry for longer than the manufacturer permits.
Our squirting dildo cleaning guide provides a full cleaning and drying routine for common reservoir systems.
What if the Pump or Tube Leaks?
A liquid leak may prevent the system from building suction. It can also allow moisture to enter areas that are difficult to clean.
Leaking Tube Connection
Switch off the product, empty it and inspect the fitting. Reconnect only if it is designed to be user-removable.
If the connector is cracked, stretched or loose after correct installation, request a compatible replacement. Tape and glue are not reliable solutions for a fluid path that must remain flexible and cleanable.
Split or Punctured Tube
Do not cut away the damaged area and reattach a shortened tube unless the manufacturer provides that repair procedure. A modified tube may pull against connectors or change the pump’s operation.
Leaking Manual Bulb
A crack in the pump bulb can draw air instead of liquid. If the bulb is detachable, ask whether an official replacement is available.
Do not cover the crack with household adhesive.
Leaking Built-In Reservoir
A damaged internal reservoir is generally not suitable for home repair. Liquid may spread beneath the exterior or reach mechanical and electrical components.
Stop using and charging the product if the location of the leak cannot be confirmed.
Troubleshooting Methods to Avoid
Do Not Insert a Needle Into the Nozzle
A needle can puncture internal tubing, alter the outlet or push dried residue deeper into the product. Use only the approved flushing method or supplied cleaning accessory.
Do Not Force the Pump
An unusually hard bulb or stalled motor may indicate a blockage. Additional force can split a tube, disconnect a fitting or damage a valve.
Do Not Blow Into the Tube
Blowing by mouth introduces moisture and contaminants into the fluid path and may not generate controlled pressure.
Do Not Use Compressed Air
High-pressure air can separate tubing, damage valves or force residue into inaccessible areas.
Do Not Mix Cleaning Chemicals
Combining cleaners can create harmful fumes, leave incompatible residue or damage materials. Use one manufacturer-approved method at a time.
Do Not Open a Sealed Housing
Disassembly may damage waterproofing, expose electrical parts and invalidate the warranty. Limit troubleshooting to removable components identified in the instructions.
Do Not Continue Using a Leaking Product
A leak into the outer material, base or motor housing is not only an output problem. It can make cleaning unreliable and damage the product further.
When Should You Replace the Squirting Dildo?
Replacement or manufacturer assessment is recommended when:
| Problem | Recommended Action |
|---|---|
| Air remains after initial priming | Recheck intake position and connections |
| Removable tube is mildly kinked | Straighten it gently and retest |
| Nozzle contains washable residue | Use the approved flushing method |
| Tube is cracked or punctured | Replace the official tube or discontinue use |
| Built-in reservoir leaks | Stop use and contact the manufacturer |
| Liquid enters the outer layer | Discontinue use |
| Powered pump overheats | Switch it off immediately |
| Electrical odor or erratic controls appear | Do not operate or charge |
| Internal tubing cannot be cleaned or dried | Consider replacing the product |
| Pump repeatedly stalls after cleaning | Request warranty assessment |
| Valve or seal is permanently damaged | Use an official replacement or replace the product |
Do not wait for a small leak to reach electrical parts or spread beneath the product surface.
Documenting the Failure for Customer Support
A short flow-test video can demonstrate the problem clearly. Keep the test non-explicit and show the product against a clean background.
Include:
- Product name and model
- Order number
- Purchase and delivery dates
- Pump and reservoir type
- Approved test liquid used
- Number of priming cycles attempted
- Location of visible bubbles or leaks
- Whether the nozzle produces any output
- Charging status for powered models
- Cleaning procedure already completed
- Photographs of connectors and damaged parts
- A brief video showing the failed pump cycle
A clear message could say:
The pump operates, but it does not draw liquid into the tube after the recommended priming procedure. Air repeatedly enters at the reservoir connector, and a small leak appears around the same fitting. I stopped using the product and have not applied glue or opened the housing. Photos and a flow-test video are attached.
Keep all tubing, caps, pumps, chargers and packaging until the claim has been resolved.
Review the seller’s warranty and defective-product policy for reporting deadlines and instructions.
Preventing Future Flow Problems
Flush the System Promptly
Do not allow residue to dry inside the reservoir, tube or nozzle. Complete the recommended flushing process soon after use.
Use Only Approved Liquids
Thick, oily, sticky or particulate-containing products may be difficult to pump and remove. Follow the manufacturer’s compatibility guidance.
Keep Tubing Straight During Use and Storage
Avoid tight bends, knots and pressure from heavier products. Do not wrap the tube tightly around the dildo.
Protect the Nozzle
Store the product where dust and lint cannot enter the outlet. Use an included cap if one is provided.
Dry Before Storage
Allow the reservoir and tubing to dry fully. A closed, damp fluid path can develop residue and odor.
Check Connections Before Filling
Confirm that removable tubing, seals and reservoir caps are properly seated before adding liquid.
Stop When the Pump Feels Different
A bulb that suddenly becomes hard, remains compressed or loses resistance may indicate a blockage or leak. Investigate before continuing.
Frequently Asked Questions
Why Does My Squirting Dildo Pump Air Instead of Liquid?
The intake may not be submerged, the system may need priming or a loose connection may be drawing in air. Check the reservoir position and tubing.
Why Are There Bubbles in the Tube?
Initial bubbles can come from an empty line. Bubbles that repeatedly enter at one fitting may indicate a loose connector, damaged seal or low liquid level.
Can I Unblock the Nozzle With a Needle?
No. A sharp object may puncture the tube or enlarge the nozzle. Use only the manufacturer-approved flushing or cleaning tool.
Why Does the Pump Bulb Stay Flat?
A blocked intake, kinked tube or stuck one-way valve may prevent the bulb from refilling. Stop pumping and inspect accessible components.
Can I Replace the Tube Myself?
Only use a replacement supplied or approved for the product. Tube diameter, material and connector fit affect both operation and cleaning.
Why Is the Stream Weak After Cleaning?
Water, cleaning residue or air may remain in the line. Reassemble the system correctly and follow its priming procedure. A continuing weak stream may indicate a blockage, leak or failing pump.
Can I Run a Powered Pump Without Liquid?
Avoid prolonged dry operation unless the manufacturer permits it. Running some pumps dry can increase heat or wear.
What if Liquid Reaches the Charging Port?
Switch the product off and do not charge it. Follow the manufacturer’s instructions and contact support, particularly if the port or electrical housing is not confirmed waterproof.
Can a Leaking Reservoir Be Glued?
A household adhesive may be incompatible, difficult to clean and unable to withstand repeated flexing. A leaking built-in reservoir generally requires authorized replacement.
Final Thoughts
A squirting dildo that does not produce a stream may have trapped air, a kinked tube, blocked nozzle, loose connection, unsuitable liquid or failing pump. Begin with the filling and priming instructions before assuming that the entire product is defective.
Troubleshoot using an approved test liquid and keep electrical components dry. Never force the pump, insert a needle, use compressed air or open a sealed housing.
If a tube, reservoir or pump leaks—or if the internal path cannot be cleaned and dried reliably—stop using the product and contact the seller. Clear photographs and a simple flow-test video can help demonstrate the fault.
Explore our squirting dildo guides and reviews to compare filling systems, pump styles, cleaning access and reservoir capacity.